Postman is een API-platform voor het bouwen en gebruiken van API’s. Postman vereenvoudigt elke stap van de API-levenscyclus en stroomlijnt samenwerking met bijvoorbeeld Business Central, zodat u sneller betere API’s kunt maken. Deze kun je gebruiken voor het testen van integraties via API’s die uit Business Central komen.
Postman download je via deze link.
Als je Postman hebt gestart, via web of via de app en je een free account hebt aangemaakt, kom in het hoofdscherm.

Je start met het aanmaken van een Workspace via Workspaces bovenaan in het scherm. Als je de instructies via deze blog wilt volgen, kies dan voor Blank Workspace, Next, Only me en dan tot slot Create. Uiteraard kies je een naam die relevant is voor jou.
Als dit is gebeurd, kies je voor New naast import en je selecteert Environment. Ook hier kies je een naam die relevant is voor jou. Testen van de API’s vanuit Business Central doe je door de volgende waarden in Postman in te vullen.
| Naam | Waarde |
|---|---|
| ApplicationClientId | Waarde uit Azure te halen / Uit de output van onderstaand script |
| ClientSecret | Waarde uit Azure te halen / Uit de output van onderstaand script |
| TenantId | Waarde uit Azure te halen / Uit de output van onderstaand script |
| CompanyName | ‘CRONUS NL’ |
| Tabel met omgevingsvariabelen | Postman API testing |
Variabelen binnen Postman via “{{” en “}}”
In Postman gebruik je variabelen als volgt. Voor bijvoorbeeld TenantId, is de schrijfwijze: {{TenantId}}. Vergeet overigens niet om de variabelen op te slaan. De knop Save zit op dezelfde hoogte als de naam van de Environment en dan rechts naast de knop Fork. Onderstaand een voorbeeld van een url met twee variabelen.
https://api.businesscentral.dynamics.com/v2.0/{{TenantId}}/Production/ODataV4/Company({{CompanyName}})/CountriesRegionsAls dat is gebeurd is het tijd om een Collection te maken. Naast de naam van de Workspace aan de linkerkant, zit een knop New naast de knop Import. Kies daar voor Collection en je kiest een naam die relevant is voor jou. Het is tijd om de authenticatie te regelen. Kies voor Authorization.
Authenticatie binnen Postman via een Collection
Om de authenticatie te regelen, klikken we in Postman op “+” naast Collections en je kiest dan voor Blank Collection. Je kunt dan direct een naam invullen zodat New Collection overschreven wordt. Tik in WordPress Samples en selecteer Authorization.
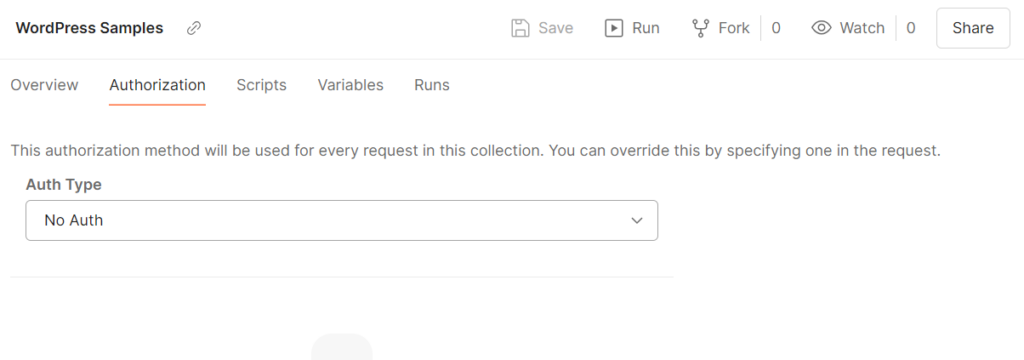
Voor Auth Type, kies je voor OAUTH 2.0. De volgende waarden vul je in volgens de tabel.
| Naam | Value |
|---|---|
| Add auth data to | Request Headers |
| Current Token | Available Token |
| Header Prefix | Bearer |
| Token Name | WordPress Samples |
| Grant Type | Authorization Code |
| Callback URL | https://businesscentral.dynamics.com/OAuthLanding.htm |
| Auth URL | https://login.microsoftonline.com/{{TenantId}}/oauth2/v2.0/authorize |
| Access Token URL | https://login.microsoftonline.com/{{TenantId}}/oauth2/v2.0/token |
| Client ID | {{ApplicationClientId}} |
| Client Secret | {{ClientSecret}} |
| Scope | https://api.businesscentral.dynamics.com/.default |
| State | |
| Client Authentication | Send as Basic Auth header |
| Tabel met waarden voor Authorization | Postman API testing |
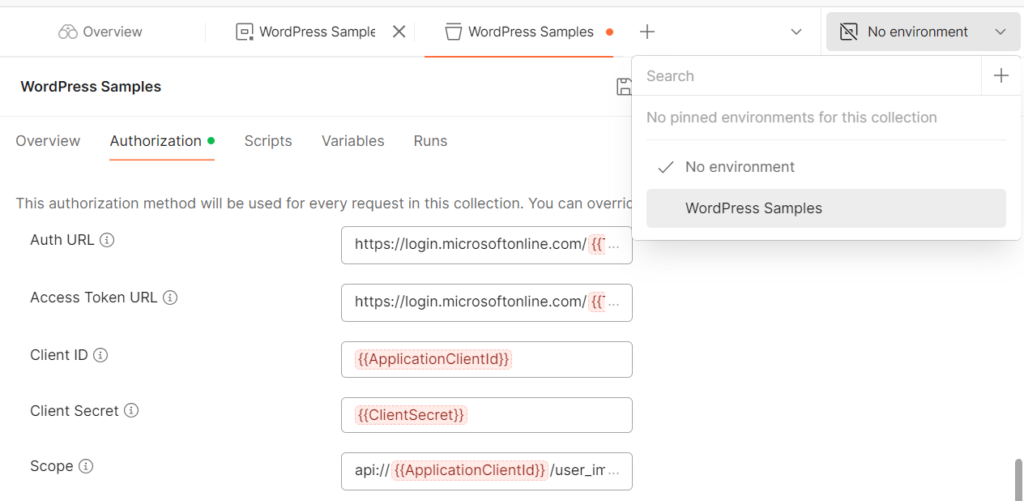
Ook hier sla je de wijzigingen weer op. De variabelen worden op dit moment misschien nog rood weergegeven omdat de environment variabelen nog niet ingevuld zijn of de omgeving is nog niet gematched aan de collectie. Als er rechts bovenaan staat “No environment” of de verkeerde omgeving, pas dit dan handmatig aan.
Het volgende script zal de vereiste Azure AD App registratie aanmaken. Het bestand PS Variables.ps1 bevat de $tenantId, de $subscriptionId, de $appName en twee bestandsnamen als variabelen. Met $global:connected voorkom je dat er steeds opnieuw wordt ingelogged. Zo is het dus mogelijk om een tweede nieuwe client secret aan te maken. Omdat het client secret nodig is voor de omgevingsvariabelen in Postman, zien we die toch in eerste instantie niet op het scherm. De applicaton client ID en het client secret slaan we ook op een veilige manier op in twee tekst bestanden. Deze kunnen echter via de laatste functie apart worden opgevraagd. Maar let op dat dit beveiligingsrisico’s met zich meebrengt. Deze functie wordt standaard niet uitgevoerd.
PowerShell script uit te voeren in Visual Studio Code
# Begin Load Variables
. "C:\Temp\WordPress Samples\PS Variables.ps1"
Clear-Host
# End Load Variables

# Begin Reset $global:connected
# . "C:\Temp\WordPress Samples\Reset-GlobalParameter.ps1"
Clear-Host
# End Reset $global:connected

# Begin Function Use-Azure
Function Use-Azure {
    param (
        [string]$tenantId,
        [string]$subscriptionId
    )

    if (-not $global:connected) {
        Update-AzConfig -DisplaySecretsWarning $false | Out-Null
        Update-AzConfig -DisplayBreakingChangeWarning $false | Out-Null
        az config set core.enable_broker_on_windows=false --only-show-errors | Out-Null
        az account clear --only-show-errors | Out-Null
        az login --only-show-errors | Out-Null
        az account set --subscription $subscriptionId --only-show-errors | Out-Null
        Connect-MgGraph -TenantId $TenantId -Scopes "User.Read","Application.ReadWrite.All","Directory.ReadWrite.All" -NoWelcome | Out-Null
        $global:connected = $true
        Write-Host "Logon was successful"
    } else {
        Write-Host "Logon has already been done. No further action needed."
    }
}
# End Function Use-Azure
Use-Azure -tenantId $tenantId -subscription $subscriptionId

# Begin Function Add-AzureAdApp
Function Add-AzureAdApp {

    param (
        [string]$appName
    )
    try {
        if (-not $global:connected) {
            throw "Logon has not been done. Please run the Use-Azure function first."
        }

        # Get all applications and filter by display name locally
        $existingApp = Get-AzADApplication | Where-Object { $_.DisplayName -eq $AppName }

        if (!$existingApp) {
            # Create a new app registration
            Write-Host "App does not exist. Creating one."
            $newApp = New-AzADApplication -DisplayName $appName -ReplyUrls "https://businesscentral.dynamics.com/OAuthLanding.htm"
            $existingApp = Get-AzADApplication | Where-Object { $_.DisplayName -eq $appName }
            $servicePrincipal = New-AzADServicePrincipal -ApplicationId $existingApp.AppId
            Start-Sleep -Seconds 20
            Write-Host "App has been created. No further action needed"

            # Assign Contributor role
            New-AzRoleAssignment -ObjectId $servicePrincipal.Id -RoleDefinitionName "Contributor" -Scope "/subscriptions/$subscriptionId" | Out-Null
        } else {
            Write-Host "App already exists. No further action needed."
        }
    } catch {
        Write-Host "Error: $_"
    }
}
# End Function Add-AzureAdApp
Add-AzureAdApp -appName $appName

# Begin Function Add-MgADAppPermissions
Function Add-MgADAppPermissions {
    try {
        if (-not $global:connected) {
            throw "Logon has not been done. Please run the Use-Azure function first."
        }

        $existingApp = Get-AzADApplication | Where-Object { $_.DisplayName -eq $AppName }
        if (!$existingApp) {
            Write-Host "App does not exist. Create an Azure AD app registration first via Add-AzureAdApp"
            # Define the required resource access parameters here
        } else {
            $params = @(
                @{
                    resourceAppId = "996def3d-b36c-4153-8607-a6fd3c01b89f"
                    resourceAccess = @(
                        @{
                            id = "d365bc00-a990-0000-00bc-160000000001"
                            type = "Role"
                        }
                        @{
                            id = "a42b0b75-311e-488d-b67e-8fe84f924341"
                            type = "Role"
                        }
                    )
                },
                @{
                    resourceAppId = "00000003-0000-0000-c000-000000000000"
                    resourceAccess = @(
                        @{
                            id = "e1fe6dd8-ba31-4d61-89e7-88639da4683d"
                            type = "Scope"
                        }
                    )
                }
            )
            $app = Get-MgApplication | Where-Object { $_.DisplayName -eq $AppName }
            Update-MgApplication -ApplicationId $app.Id -RequiredResourceAccess $params
            Write-Host "Permissions added to the Azure AD App. No further action needed"
            $AppIdUri = "api://$($app.AppId)"
            Update-MgApplication -ApplicationId $app.Id -IdentifierUris @($AppIdUri)

            # Check if the scope already exists
            $existingScopes = $app.Api.Oauth2PermissionScopes | Where-Object { $_.Value -eq "user_impersonation" }
            if (-not $existingScopes) {
                $api = @{
                    oauth2PermissionScopes = @(
                        @{
                            AdminConsentDescription = "Allows the app to read the signed-in user's files."
                            AdminConsentDisplayName = "Read user files"
                            UserConsentDescription = "Allows the app to read your files."
                            UserConsentDisplayName = "Read your files"
                            Type = "User"
                            Value = "user_impersonation"
                            Id = $([guid]::NewGuid())
                        }
                    )
                }
                Update-MgApplication -ApplicationId $app.Id -Api $api
                Write-Host "Scope added to the Azure AD App. No further action needed"
            } else {
                Write-Host "Scope already exists. No further action needed"
            }
        }
    } catch {
        Write-Host "Error: $_"
    }
}
# End Function Add-MgADAppPermissions
Add-MgADAppPermissions

# Begin Function Add-AzureADSecret
Function Add-AzureAdSecret {

    param (
        [string]$applicationClientFile,
        [string]$clientSecretFile
    )

    try {
        if (-not $global:connected) {
            throw "Logon has not been done. Please run the Use-Azure function first."
        }

        $app = Get-MgApplication -Filter "displayName eq '$appName'"
            if (-not $app) {
                Write-Host "App registration does not exist. Skipping creation of secret."
            } else {
                Write-Host "App registration exists. Creating secret."

                $passwordCredential = @{
                    displayName = $secretDisplayName
                    startDateTime = (Get-Date)
                    endDateTime = (Get-Date).AddYears(2)
                }

                $newPassword = Add-MgApplicationPassword -ApplicationId $app.Id -PasswordCredential $passwordCredential
                $appSecret = $newPassword.SecretText
                Write-Host "De applicaton client ID has been created. No further actions needed."
                Write-Host "De client secret has been created. No further actions needed"
                $app.AppId | ConvertTo-SecureString -AsPlainText -Force | ConvertFrom-SecureString | Out-File $ApplicationClientIdFile # Adding to a file
                $appSecret | ConvertTo-SecureString -AsPlainText -Force | ConvertFrom-SecureString | Out-File $clientSecretFile # Adding to a file
            }
    } catch {
        Write-Host "Error: $_"
    }
}
# End Function Add-AzureADSecret

Add-AzureADSecret -applicatonClientId $applicationClientIdFile -clientSecret $clientSecretFile

# Begin Function Use-AzureADSecret
Function Use-AzureAdSecret {
    try {
        if (-not $global:connected) {
            throw "Logon has not been done. Please run the Use-Azure function first."
        }

        $app = Get-MgApplication -Filter "displayName eq '$appName'"
            if (-not $app) {
                Write-Host "App registration does not exist. Use Add-AzureADSecret first."
            } else {
                Write-Host "App registration exists. Showing secret on screen."

                Get-MgApplication -ApplicationId $app.Id | Format-List Id, DisplayName, AppId, SignInAudience, PublisherDomain
                $encryptedClientSecret = Get-Content -Path "$ClientSecretFile"
                $secureClientSecret = ConvertTo-SecureString -String $encryptedClientSecret
                $plainClientSecret = [System.Runtime.InteropServices.Marshal]::PtrToStringAuto([System.Runtime.InteropServices.Marshal]::SecureStringToBSTR($secureClientSecret))
                Write-Host "Your client secret is: "$plainClientSecret""
            }
    } catch {
        Write-Host "Error: $_"
    }
}
# Begin Function Use-AzureADSecret
# Use-AzureADSecret
De output van het PowerShell script is als volgt:
Logon has already been done. No further action needed.
App already exists. No further action needed.
Permissions added to the Azure AD App. No further action needed
Scope already exists. No further action needed
App registration exists. Creating secret.
De applicaton client ID has been created. No further actions needed.
De client secret has been created. No further actions needed
Als het laatste script ook wordt uitgevoerd is de output als volgt.
App registration exists. Showing secret on screen.

Id              : 78944730-918a-4fad-9fb3-4de17c67afe5
DisplayName     : WordPress Sample
AppId           : 303e8655-007f-4b82-ac10-35c160702d04
SignInAudience  : AzureADMyOrg
PublisherDomain : digitalemels.nl

Your client secret is:  ~v18Q~ttnjU6qg....
Als dit allemaal gebeurd is, kan de token worden opgevraagd. Binnen Postman, kies je voor Authorization binnen de Collection en je scrolt helemaal naar beneden tot je een oranje button tegenkomt met Get New Access Token.
Het resultaat is bijvoorbeeld een Access Token die met Use Token wordt gebruikt. Een voorbeeld van een gedeeltelijke token die gedebugged kan worden zien we hier:
eyJ0eXAiOiJKV1QiLCJhbGciOiJSUzI1NiIsIng1dCI6IkpETmFfNGk0cjdGZ2lnTDNzSElsSTN4Vi1JVSIsImtpZCI6IkpETmFfNGk0cjdGZ2lnTDNzSElsSTN4Vi1JVSJ9.eyJhdWQiOiJhcGk6Ly9lZTFjYzQ3NS05ZjNlLTDeze token kan worden gedebugged via JWT.io.

Postman en Business Central
Ook in Business Central moeten een aantal dingen gebeuren. Nadat je bent aangelogged binnen Business Central en het juiste bedrijf hebt geselecteerd, zoek je naar Microsoft Entra Applications en vanuit daar kies je voor New. De Client ID is de Applicaton Client ID die je gebruikt hebt binnen Postman en die via het script zijn aangemaakt. Als tip zou ik willen meegeven om voor de Description de naam van de Azure AD App registratie te gebruiken of wel de value van $appName. Nadat je de State hebt aangepast van Disabled naar Enabled maakt Business Central een applicaton user aan.
De volgende permissie sets zijn meestal nodig:
| Permission Set | Description |
|---|---|
| D365 AUTOMATION | Dynamics 365 Automation |
| EXTEN. MGT. – ADMIN | Extension Management – Admin |
| Tabel met permissie sets | Business Central Entra Application |
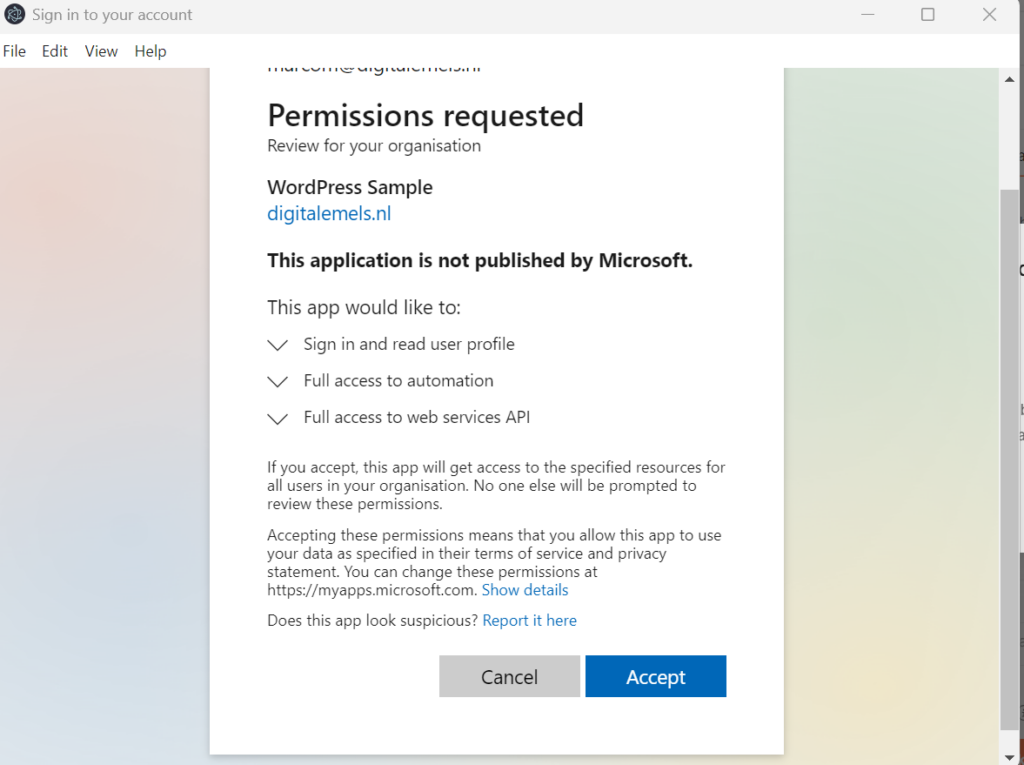
Grant Consent is de laatste stap. Een Global Administrator moet de consent verlenen.
Begin testen binnen Postman met een url van Business Central
Om in Postman een test uit te voeren, moeten we binnen de Webservices van Business Central een url te kopiëren. Een voorbeeld van een URL heb ik alvast geschikt gemaakt voor Postman.
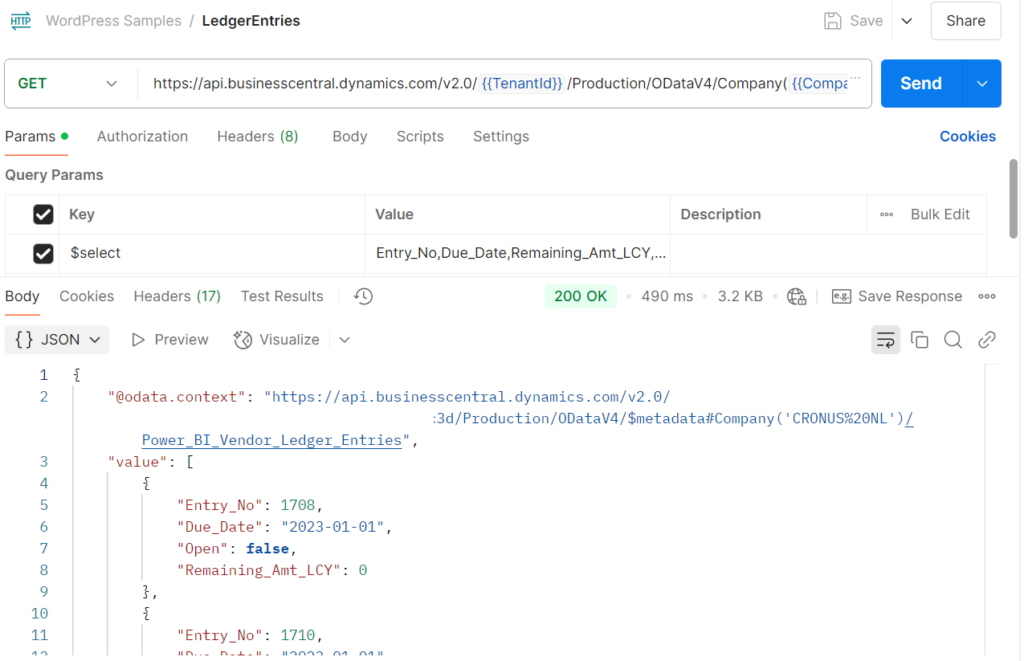
We gaan nu weer terug naar Postman. In Postman, kiezen we voor Add a Request dat zich onder de Collection naam bevindt. Ook hier vul je natuurlijk weer een relevante naam in. In dit geval Ledger Entries. Naast GET vul je bovenstaande URL in en bij Authorization kies je voor de Auth Type Inherit auth from parent. Voordat je op Send klikt, sla je dit request op.
Het resultaat is een 200 OK melding:
Meer informatie over Microsoft Business Central vind je hier. Meer informatie over de auteur van deze blog post vind je hier.


